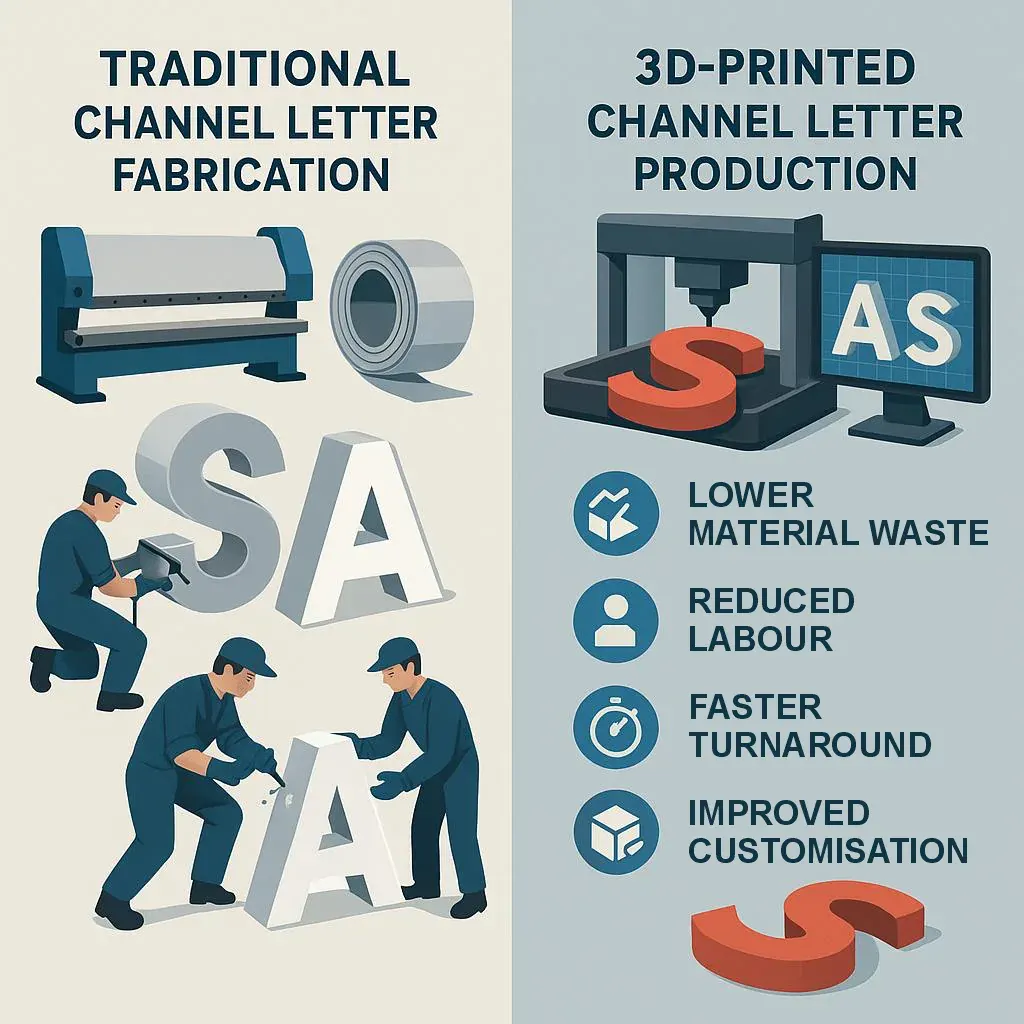
3D-Printed Channel Letters: Fixes for 12 Common Problems (Print, Finish, Lighting, Durability)
Published Updated
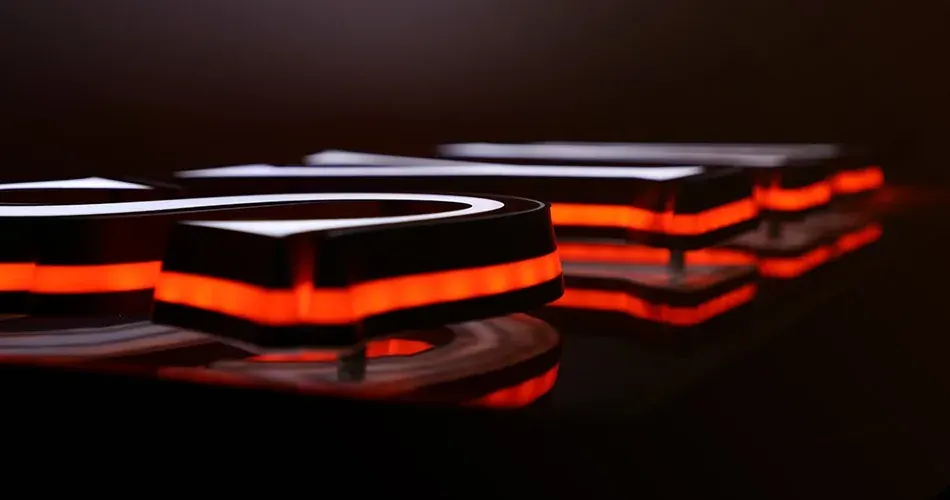
Sign makers searching about 3D channel-letter printing mostly worry about outdoor durability, lighting uniformity, surface finish, dimensional accuracy / warping, and code / compliance & electrical safety. The Sign Group product line addresses many of these with dedicated materials (HFPC), UV-curing hybrid workflows, large-format machines and one-click design software – but each choice brings trade-offs and practical steps you must follow to avoid the common pain points
Introduction - why this guide and sources
Below are the most commonly queried topics people search about when they consider 3D-printing or otherwise producing 3D channel letters (issues, fears, and troubleshooting queries). We pulled patterns from industry articles, troubleshooting guides, sign-maker forums and 3D-printing resources – each item includes a short explanation of why people worry about it.
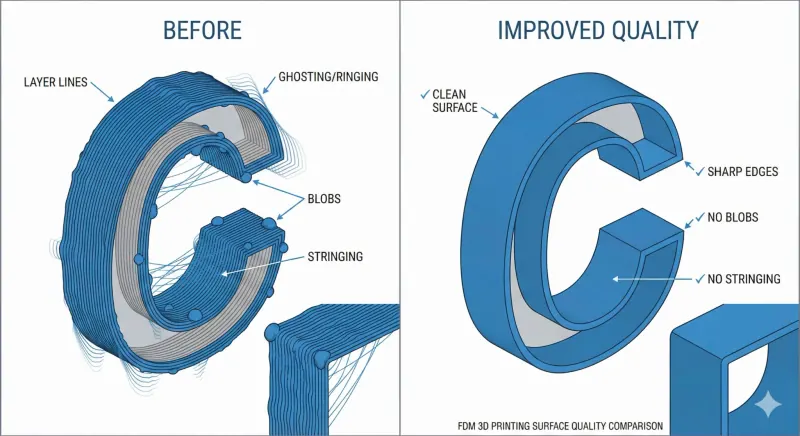
1) Print quality: layer lines, ringing, blobs, stringing, surface finish
Why it happens: large-format FDM prints amplify typical layer artefacts. Layer height, extrusion tuning, nozzle temperature and mechanical vibration (frame/fast motion) create visible steps or ringing on faces.
Sign Group context: their machines are purpose-built with auto-levelling, CoreXY motion options and industrial tuning to reduce these effects; hybrid UV-acrylic workflows are offered to get smoother faces without extreme sanding.
Fixes & production strategy
- Use smaller layer heights for visible faces (0.15–0.2 mm) and coarser settings for internal supports/backs.
- Tune acceleration/jerk / motion profiles (CoreXY systems help reduce ringing). Sign Group highlights CoreXY advantages for speed & precision. sg3dprinters.com
- Consider hybrid finish: print returns/structure in FDM material and apply a liquid UV acrylic face for glass-smooth light diffusion (Sign Group offers hybrid UV options). That removes the need for intensive sanding. sg3dprinters.com
- For logos/letters that must be near-perfect, print the face separately on a fine-resolution machine or use the UV acrylic overlay technique.
Checklist (QA):
- Print sample 1:1 section at production settings → inspect in daylight and under installed LEDs.
- If visible layer lines persist, move to hybrid UV face or increase post-processing (fill → sand → spray primer).
2) Warping & dimensional accuracy - fit-to-face tolerances
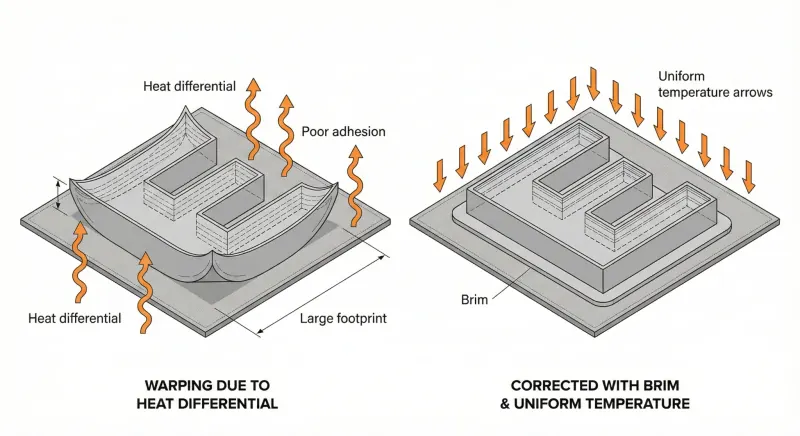
Why it happens: large flat areas and temperature gradients cause warping. Tolerance stacks cause faces, returns and mounts not to fit.
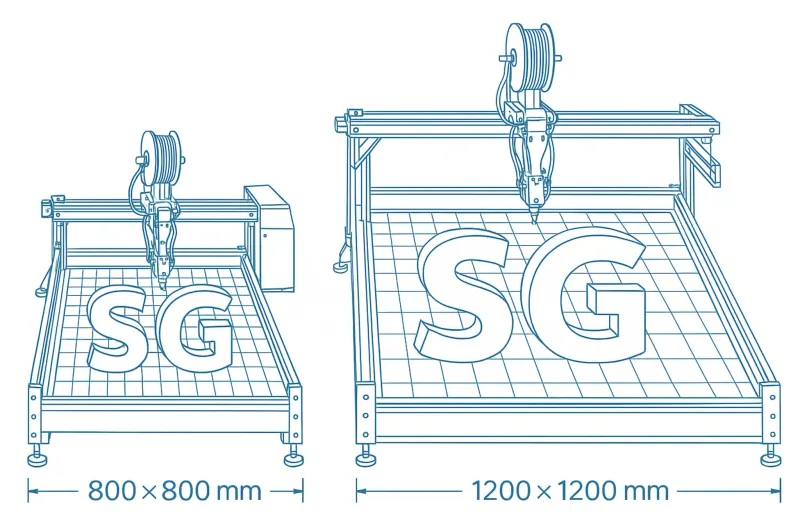
Sign Group capabilities: large beds (e.g., 800×800 mm and 1200×1200 mm) allow printing complete letters or large halves to avoid seams, and printer features like bed heating, enclosure and material-specific settings reduce warp.
Fixes
- Use HFPC or PETG-like formulations recommended for signage – engineered filaments have lower shrink/warpage. Sign Group supplies HFPC designed for outdoor signage
- Print with enclosure and controlled bed/ambient temps.
- Design for assembly: add alignment tabs/dovetails and tolerance gaps (experiment: 0.5–1.5 mm depending on size). For very large letters, print in sections with interlocks rather than risk single large warped part.
3) Material durability & weather resistance (UV, heat, cold)
Concerns: outdoor UV yellowing, embrittlement in cold, softening in heat, and adhesive failures.
Sign Group claim: they offer a specialised HFPC (High Flexible Polymer Composite) formulated for outdoor illuminated signage with UV resistance and a quoted operational temperature range (their materials are positioned to resist UV, oxidation and -40°C to 65°C extremes). Use of UV-curable liquid acrylic faces is presented as a weather-resistant face option.
Practical guidance
- Use HFPC or outdoor-grade PETG/ASA where possible (HFPC is purpose-formulated for sign use).
- Coat and seal seams: use compatible adhesives (manufacturer recommended) and a UV-stable paint/clearcoat over joins.
- If colour retention is critical, spec UV inhibitors or paint systems designed for signage.
4) Lighting issues - hotspots, uneven illumination, LED placement, power supplies
Why it’s a top worry: 3D geometry interacts with LED placement differently than flat acrylic faces – internal cavities, non-uniform diffusion and specular reflections create hotspots. Many search queries ask “why do I see LED dots?” or “how to avoid hotspots in 3D letters”. Sign Group provides examples of front & side-lit and smart RGB solutions and recommends design and diffuser strategies.
How to plan LED layout
- Design internal ribs and diffusers into the 3D model – place LEDs in channels or along continuous strips behind a diffusing layer (liquid acrylic face or milky diffuser).
- Prefer high-density LED strips with a diffuser for large faces; for tight budgets, use LED modules spaced more closely near edges to avoid dark corners.
- Use test rigs: print a representative cross-section and test lighting in the shop before committing to a full run.
- Choose constant-current drivers rated for outdoor use and factor in thermal dissipation – Sign Group highlights smart RGB options and LED integration examples.
5) Structural strength, mounting and wind/load safety
Concerns about how a printed letter will be mounted, whether clips/rivets/vinyl will hold, how the sign reacts to wind, and if printed parts can take long-term mechanical stress. Varisigns.com
Why it matters: channel letters are mounted externally and must resist wind loads and thermal cycling.
Fixes
- Use internal ribs, thicker walls where mounting points are, and metal inserts or glass-filled filaments at mechanical interfaces.
- Design mount flanges and bolt patterns to match building anchors; if uncertain, run a structural check with a local structural engineer for large signs.
- Consider hybrid builds: 3D-printed decorative shells with metal backing plates for load transfer.
6) Size, scale limits & throughput
Sign Group offering: large-format machines (up to 1200×1200 mm) designed to run 24/7 with claims of low energy consumption (1-2 kWh in 24 h), multi-machine control and one-person supervision. That reduces labour bottlenecks and enables faster per-letter throughput than some traditional workflows. 3dprinters
Recommendations for sign shops
- For high volume, invest in multiple large machines and automation (one-click file conversion tools) to eliminate manual CAM prep. Sign Group markets one-click 3D file generation tools to speed design-to-print.
- Balance print time vs finish: printing full polished faces takes time; hybrid approaches (printed returns + liquid acrylic face) are often faster to finish.
7) Post-processing & finishing (sanding, filler, paint, vinyl)
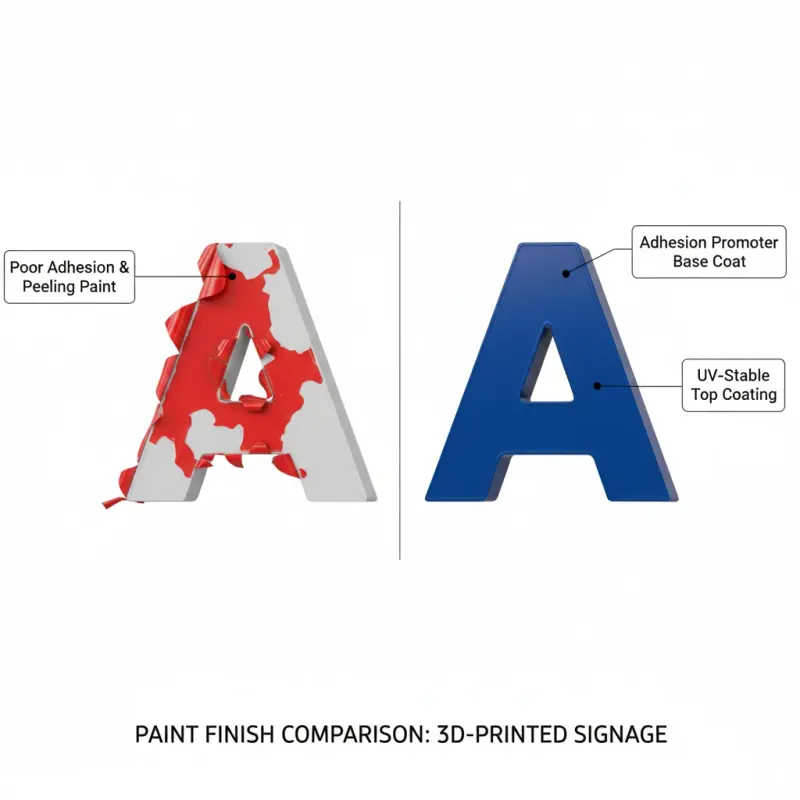
Problems reported: uneven paint adhesion, rough edges, visible seams under vinyl. Sign Group recommends UV acrylic faces or liquid finishes to reduce sanding labour.
Best practice
- Use fillers & flexible primers designed for plastic; sand progressively and use adhesion promoters before topcoat.
- If applying vinyl, ensure edges are clean and slightly chamfered where the face meets the return; test adhesion at a small area and on the specific printed material.
8) Design & file prep - slicing, wall thickness, supports, wiring channels
Common mistakes: printing with too-thin walls, no wiring access, or support placement that scars visible faces. Sign Group emphasises their one-click design and CDR/INC slicing pipeline to simplify file prep for sign makers.
Design rules
- Wall thickness: For structural returns use 3-6 mm depending on size; for faces that need light diffusion, print thicker or use liquid acrylic or acrylic face.
- Add wiring channels and service access in the model (removable panels or service hatches).
- Orient faces to avoid supports on the visible face; design sacrificial mounting flanges if needed.
9) Electrical safety, certifications & code compliance
Concerns: whether 3D printed letters meet local electrical and safety codes (UL listing, IP ratings). The Sign Group documentation and product pages stress industry-grade drivers and wiring, but shop owners must ensure local compliance for installation.
Action items
- Use UL-listed LED drivers and connectors for installations in jurisdictions that require them.
- Provide clear installation instructions and mark service access for qualified electricians.
- Consider IP rating strategies: gaskets, sealed face seams and drainage channels.
10) Paint/coating adhesion & long-term finish
Common queries: “Why is my paint peeling at letter seams?” and “How to prep printed plastic for durable exterior paint.”
Problem: peeling at seams or fading.
Solutions
- Use adhesion promoters for the filament family (e.g., primer for PETG/ASA), and finish with UV-stable paints. Where possible, bond a UV acrylic face to provide the visual surface and protect the printed return. 3dprinters
11) Machine reliability, maintenance & ROI
Sign shops worry about buying/maintaining new equipment (printer uptime, bending machine obsolescence, maintenance schedules). People compare CAPEX and ROI. Varibend.com
Sign Group claim: 24/7 operation, low energy consumption, and on-site training + 2-year warranty* for peace of mind – all points that affect ROI and uptime. They also sell industrial filament driers and service tools to keep throughput stable.
Checklist for buyers
- Ask about SLA for spare parts and availability of local service.
- Plan for regular maintenance (belts, bearings, hotend replacement) and keep critical spares on site.
- Run a cost model comparing labour hours saved vs machine CAPEX and material cost — Sign Group claims up to 60% production cost savings vs traditional methods in some blog posts (use as a performance example, not a universal guarantee). 3dprinters
12) Reparability & on-site maintenance of printed letters
What to expect: small cracks or damaged LEDs can often be repaired without full replacement: patch with compatible filament + adhesive or replace modular face sections. Design for serviceability from the outset (removable face panels, replaceable LED strips). Sign Group examples show modular LED integrations and service access considerations.
A 12-point production checklist (replicable for a shop SOP)
- Confirm material: HFPC / outdoor PETG / ASA for returns. sg3dprinters.com
- Print a 1:1 lighting test cross-section with final LED layout. sg3dprinters.com
- Use enclosure + controlled temps for large parts. sg3dprinters.com
- Apply UV acrylic face if you need glass-smooth diffusion. sg3dprinters.com
- Check mounting flanges & mechanical inserts in the CAD model.
- Use UL-listed drivers and document wiring runs. sg3dprinters.com
- Prime & test adhesion on scrap before full paint. sg3dprinters.com
- Set slicer profiles: fine layers for visible face; coarse for nonvisible fill.
- Bake / dry filaments if environment humidity > 50% (industrial driers available). sg3dprinters.com
- Schedule preventive maintenance for printers and keep spares. sg3dprinters.com
- Label service panels with wiring diagrams for installers.
- Run a post-install QA under daytime and night lighting.
Q: Will 3D printed channel letters last outside?
A: Yes — when made from outdoor-grade filaments (e.g., HFPC, ASA or specially formulated PETG), sealed and finished correctly, 3D-printed channel letters can be long-lasting. For best longevity use a UV acrylic face or protective coatings. (See Sign Group HFPC & UV workflows).
Q: How do I avoid LED hotspots?
A: Plan for continuous high-density LED strips behind a diffusing layer, design internal ribs to uniformly space light, and validate with a 1:1 lighting test part. Sign Group’s examples demonstrate diffused liquid acrylic faces and LED channelling.
Q: Do I need a special printer for channel letters?
A: Large-format, industrially tuned printers (auto-levelling, enclosures, 800–1200 mm beds) plus one-click design workflows dramatically lower risk and labour. Sign Group machines target these exact needs.
*Conditions apply, ask us for the terms.